
How to Grow Microgreens at Home Without Buying Special Gardening Equipment

Growing fresh greens at home does not require a garden, a large balcony or expensive gardening tools. Microgreens are young vegetable and herb seedlings that can be grown in a small container on a kitchen windowsill, shelf or balcony. They are usually ready to harvest within one to three weeks, depending on the variety and growing conditions.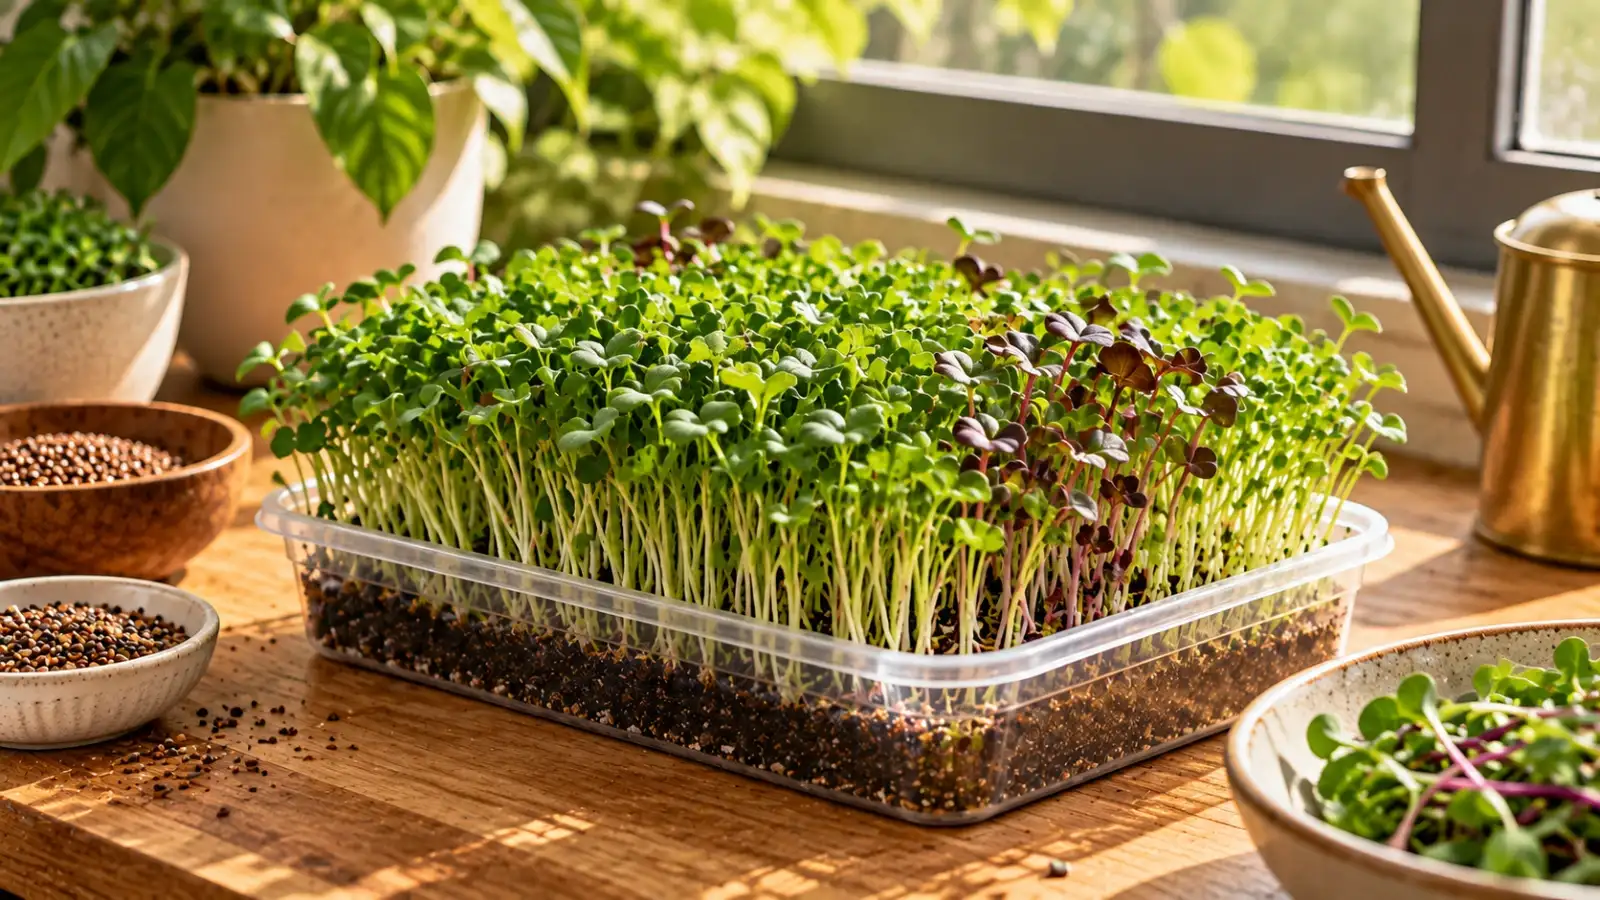
These tender greens can add colour, flavour and texture to salads, sandwiches, wraps, soups and homemade meals. Radish, mustard, broccoli and peas are popular choices for beginners because they are relatively straightforward to grow. With a few basic supplies already available at home, you can start growing microgreens without investing in a specialised gardening kit.
One of the main advantages of growing microgreens is that they require very little space. A shallow food container can hold enough seedlings for several meals, making them suitable for people living in flats or homes without gardens. You can also grow small batches throughout the year, provided the plants receive adequate light and the growing conditions remain suitable.
Fresh microgreens can contribute vitamins, minerals and other plant compounds to your diet. Their nutritional composition varies according to the plant variety and growing conditions, so it is best to treat them as a useful addition to a balanced diet rather than a replacement for other vegetables.
A clean, shallow plastic food container can serve as your growing tray. Reused takeaway containers or food packaging may work, provided they are made from suitable food-safe material and can be cleaned properly. If possible, use a container with drainage holes and place it over another container to catch excess water.
You will also need seeds, a small amount of clean growing medium, drinking-quality water and a pair of clean scissors for harvesting. A kitchen spoon can help spread the growing medium evenly, while a small jug or spray bottle can be used for watering.
For the growing medium, use fresh potting mix or clean cocopeat intended for growing plants. Ordinary garden soil taken directly from outdoors is not the best choice because it can be dense and may contain unwanted organisms. You do not need to add fertiliser for a short microgreen growing cycle, as the seeds contain much of the energy required for their initial growth.
Radish microgreens are a useful starting point because they generally germinate quickly and develop a peppery flavour. Mustard greens are another option if you enjoy a sharper taste. Broccoli microgreens have a milder flavour, while pea shoots are tender and suitable for adding to salads, sandwiches and cooked dishes.
Use seeds sold specifically for sprouting or microgreen production, or seeds clearly labelled as untreated and suitable for edible crops. Avoid garden seeds treated with fungicides or other chemicals that are not intended for food production. Do not assume that every seed sold for planting is safe to grow for direct consumption.
Add approximately 2 to 3 centimetres of fresh growing medium. Spread it evenly with a spoon, breaking up large lumps without pressing it down too firmly. The surface should be level enough for the seeds to spread evenly.
Moisten the growing medium before sowing. It should feel damp throughout, but it should not be dripping wet or covered with standing water.
Press the seeds gently against the surface so that they make contact with the moist medium. Some varieties benefit from a very light covering of growing medium, while others can be left exposed. Check the requirements of the particular variety rather than covering every seed automatically.
If the seeds need soaking before planting, follow the recommended soaking time on the packet. Peas and some larger seeds may benefit from soaking, but this is not necessary for every microgreen variety.
For varieties that benefit from darkness during initial germination, loosely cover the container with another clean container or a suitable cover. Check the seeds daily and make sure the growing medium remains moist. Remove the cover when most seedlings have emerged, or follow the instructions for your chosen variety.
Do not leave the seeds sitting in excess water. Too much moisture and poor airflow can encourage mould and seedling diseases. If the container develops a sour smell or the seeds appear slimy, stop using the batch.
Turn the container occasionally if the seedlings lean strongly towards one side. This can help them grow more evenly. If the stems become unusually long and weak, the plants may not be receiving enough light.
Avoid placing the container in harsh direct sunlight for long periods if the growing medium dries out quickly. The aim is to provide sufficient light while keeping the roots and growing medium from becoming excessively hot or dry.
If your container has drainage holes, you can place it briefly in a shallow tray of water and allow the growing medium to absorb moisture from below. Remove it once the medium is damp and let excess water drain away. This method also helps keep the leaves dry, reducing the risk of moisture-related problems.
If your container has no drainage holes, use much smaller amounts of water and check carefully for pooling. Water requirements vary with the room temperature, airflow, container size and type of growing medium, so follow the condition of the plants rather than sticking rigidly to a fixed watering schedule.
Wash your hands and use clean, sharp scissors to cut the stems just above the growing medium. Avoid pulling the plants out by their roots, as this can bring soil or growing medium into the harvested greens.
Cut only what you plan to use, then prepare the greens promptly. Microgreens are delicate and perishable, so they are best eaten soon after harvesting. A tray will usually provide one main harvest rather than repeatedly producing new growth.
Watch for signs of trouble as the seedlings develop. Healthy roots can produce fine, hair-like structures around the stems, so not every white strand is mould. However, fuzzy growth spreading across the growing medium, an unpleasant smell, slimy stems or collapsing seedlings can indicate a problem. When in doubt, discard the affected batch rather than eating it.
Do not overcrowd the seeds. A dense layer may initially look productive, but poor airflow can make it easier for mould to develop. Follow the seed packet's recommendations and use a little less seed if your first attempt becomes too crowded.
You can also make growing more convenient by starting a new container every few days. This staggered approach allows you to harvest small amounts regularly instead of having more greens ready than you can use at once.
They also work well in wraps, grain bowls, lentil dishes and vegetarian burgers. For hot meals, add delicate greens towards the end of cooking or just before serving to preserve their texture. Some varieties have stronger flavours than others, so begin with a small quantity until you know which ones you prefer.
Wash the harvested greens under clean running water before eating. Use them promptly or refrigerate them in a clean container. Because microgreens are eaten young and often raw, cleanliness matters throughout the growing and harvesting process. People who need to avoid raw produce for medical reasons should follow advice from their healthcare professional.
Another is overwatering. Microgreens need consistent moisture, but waterlogged growing medium can damage roots and encourage mould. If the surface remains wet for long periods, reduce watering and improve drainage and airflow.
Insufficient light can also produce tall, weak seedlings. Place the tray in the brightest suitable location available and rotate it when necessary. Finally, do not wait too long to harvest. Older seedlings can become tougher or develop stronger flavours, depending on the variety.
Growing microgreens at home is a practical way to start gardening without buying special equipment or setting aside much space. A clean food container, suitable seeds, fresh growing medium, water and a bright windowsill are enough to begin.
Start with an easy variety such as radish or mustard, monitor moisture carefully and keep everything clean. Once you understand how quickly your chosen seeds grow, you can experiment with broccoli, peas and other edible greens. With small, regular batches, you can enjoy fresh home-grown microgreens for salads, sandwiches and everyday vegetarian meals.
These tender greens can add colour, flavour and texture to salads, sandwiches, wraps, soups and homemade meals. Radish, mustard, broccoli and peas are popular choices for beginners because they are relatively straightforward to grow. With a few basic supplies already available at home, you can start growing microgreens without investing in a specialised gardening kit.
What Are Microgreens and Why Grow Them at Home?
Microgreens are young plants harvested after their first leaves develop, but before they grow into mature vegetables. They are different from sprouts, which are generally harvested earlier and eaten with their roots and seeds. Microgreens are cut above the growing medium, and their roots are left behind.One of the main advantages of growing microgreens is that they require very little space. A shallow food container can hold enough seedlings for several meals, making them suitable for people living in flats or homes without gardens. You can also grow small batches throughout the year, provided the plants receive adequate light and the growing conditions remain suitable.
Fresh microgreens can contribute vitamins, minerals and other plant compounds to your diet. Their nutritional composition varies according to the plant variety and growing conditions, so it is best to treat them as a useful addition to a balanced diet rather than a replacement for other vegetables.
Everyday Household Items You Need
You do not need specialised trays, grow lights or automatic watering systems to begin. A few ordinary household items are enough for a small batch.A clean, shallow plastic food container can serve as your growing tray. Reused takeaway containers or food packaging may work, provided they are made from suitable food-safe material and can be cleaned properly. If possible, use a container with drainage holes and place it over another container to catch excess water.
You will also need seeds, a small amount of clean growing medium, drinking-quality water and a pair of clean scissors for harvesting. A kitchen spoon can help spread the growing medium evenly, while a small jug or spray bottle can be used for watering.
For the growing medium, use fresh potting mix or clean cocopeat intended for growing plants. Ordinary garden soil taken directly from outdoors is not the best choice because it can be dense and may contain unwanted organisms. You do not need to add fertiliser for a short microgreen growing cycle, as the seeds contain much of the energy required for their initial growth.
Choose the Right Seeds for Beginners
The seeds you choose can influence how quickly your microgreens grow and how easy they are to manage. Start with one variety rather than mixing several types in your first batch. Different plants may germinate and mature at different rates, making them harder to manage together.Radish microgreens are a useful starting point because they generally germinate quickly and develop a peppery flavour. Mustard greens are another option if you enjoy a sharper taste. Broccoli microgreens have a milder flavour, while pea shoots are tender and suitable for adding to salads, sandwiches and cooked dishes.
Use seeds sold specifically for sprouting or microgreen production, or seeds clearly labelled as untreated and suitable for edible crops. Avoid garden seeds treated with fungicides or other chemicals that are not intended for food production. Do not assume that every seed sold for planting is safe to grow for direct consumption.
Step-by-Step Guide to Growing Microgreens at Home
Step 1. Prepare Your Container
Wash the container thoroughly with soap and water, then rinse it well and allow it to dry. If it does not already have drainage holes, make a few small holes in the bottom if the material can be pierced safely. Place it over a second container to catch excess water.Add approximately 2 to 3 centimetres of fresh growing medium. Spread it evenly with a spoon, breaking up large lumps without pressing it down too firmly. The surface should be level enough for the seeds to spread evenly.
Moisten the growing medium before sowing. It should feel damp throughout, but it should not be dripping wet or covered with standing water.
Step 2. Sow the Seeds Evenly
Scatter the seeds over the surface of the growing medium. Small seeds can be placed relatively close together, while larger seeds such as peas need more space. Follow the packet's sowing instructions where available, and avoid creating several thick piles of seeds.Press the seeds gently against the surface so that they make contact with the moist medium. Some varieties benefit from a very light covering of growing medium, while others can be left exposed. Check the requirements of the particular variety rather than covering every seed automatically.
If the seeds need soaking before planting, follow the recommended soaking time on the packet. Peas and some larger seeds may benefit from soaking, but this is not necessary for every microgreen variety.
Step 3. Keep the Seeds Moist During Germination
After sowing, use a spray bottle or a small jug to moisten the surface gently. Avoid pouring water directly onto the seeds with force, as this can wash them into one corner of the container.For varieties that benefit from darkness during initial germination, loosely cover the container with another clean container or a suitable cover. Check the seeds daily and make sure the growing medium remains moist. Remove the cover when most seedlings have emerged, or follow the instructions for your chosen variety.
Do not leave the seeds sitting in excess water. Too much moisture and poor airflow can encourage mould and seedling diseases. If the container develops a sour smell or the seeds appear slimy, stop using the batch.
Step 4. Move the Seedlings Into Good Light
Once the seedlings emerge, place the container near a bright window where the plants can receive plenty of natural light. A windowsill with good daylight can work well, although the amount of light available will depend on the season, the direction of the window and nearby buildings.Turn the container occasionally if the seedlings lean strongly towards one side. This can help them grow more evenly. If the stems become unusually long and weak, the plants may not be receiving enough light.
Avoid placing the container in harsh direct sunlight for long periods if the growing medium dries out quickly. The aim is to provide sufficient light while keeping the roots and growing medium from becoming excessively hot or dry.
Step 5. Water Carefully as the Plants Grow
After germination, check the growing medium at least once a day. Add water when the surface begins to dry, but avoid keeping it permanently saturated.If your container has drainage holes, you can place it briefly in a shallow tray of water and allow the growing medium to absorb moisture from below. Remove it once the medium is damp and let excess water drain away. This method also helps keep the leaves dry, reducing the risk of moisture-related problems.
If your container has no drainage holes, use much smaller amounts of water and check carefully for pooling. Water requirements vary with the room temperature, airflow, container size and type of growing medium, so follow the condition of the plants rather than sticking rigidly to a fixed watering schedule.
Step 6. Harvest When the Greens Are Ready
Many microgreens can be harvested in around 7 to 14 days, although some varieties take longer. Look for healthy stems and developed seed leaves, with the first true leaves beginning to appear. The ideal harvesting stage depends on the variety and your preferred flavour and texture.Wash your hands and use clean, sharp scissors to cut the stems just above the growing medium. Avoid pulling the plants out by their roots, as this can bring soil or growing medium into the harvested greens.
Cut only what you plan to use, then prepare the greens promptly. Microgreens are delicate and perishable, so they are best eaten soon after harvesting. A tray will usually provide one main harvest rather than repeatedly producing new growth.
How to Keep Microgreens Healthy Without Special Equipment
Good hygiene and sensible watering are more important than expensive tools. Always start with clean containers, fresh growing medium and suitable seeds. Keep the growing area reasonably ventilated, and do not allow water to collect beneath the tray for long periods.Watch for signs of trouble as the seedlings develop. Healthy roots can produce fine, hair-like structures around the stems, so not every white strand is mould. However, fuzzy growth spreading across the growing medium, an unpleasant smell, slimy stems or collapsing seedlings can indicate a problem. When in doubt, discard the affected batch rather than eating it.
Do not overcrowd the seeds. A dense layer may initially look productive, but poor airflow can make it easier for mould to develop. Follow the seed packet's recommendations and use a little less seed if your first attempt becomes too crowded.
You can also make growing more convenient by starting a new container every few days. This staggered approach allows you to harvest small amounts regularly instead of having more greens ready than you can use at once.
Simple Ways to Use Home-Grown Microgreens
Fresh microgreens can be added to everyday meals without complicated preparation. Sprinkle radish or mustard greens over a vegetable sandwich, add broccoli microgreens to a salad, or use pea shoots as a finishing touch for homemade vegetable noodles.They also work well in wraps, grain bowls, lentil dishes and vegetarian burgers. For hot meals, add delicate greens towards the end of cooking or just before serving to preserve their texture. Some varieties have stronger flavours than others, so begin with a small quantity until you know which ones you prefer.
Wash the harvested greens under clean running water before eating. Use them promptly or refrigerate them in a clean container. Because microgreens are eaten young and often raw, cleanliness matters throughout the growing and harvesting process. People who need to avoid raw produce for medical reasons should follow advice from their healthcare professional.
Common Mistakes to Avoid
One frequent mistake is using seeds that have been chemically treated or are not intended for edible crops. Choosing appropriate seeds from a reliable supplier is an important first step.Another is overwatering. Microgreens need consistent moisture, but waterlogged growing medium can damage roots and encourage mould. If the surface remains wet for long periods, reduce watering and improve drainage and airflow.
Insufficient light can also produce tall, weak seedlings. Place the tray in the brightest suitable location available and rotate it when necessary. Finally, do not wait too long to harvest. Older seedlings can become tougher or develop stronger flavours, depending on the variety.
Growing microgreens at home is a practical way to start gardening without buying special equipment or setting aside much space. A clean food container, suitable seeds, fresh growing medium, water and a bright windowsill are enough to begin.
Start with an easy variety such as radish or mustard, monitor moisture carefully and keep everything clean. Once you understand how quickly your chosen seeds grow, you can experiment with broccoli, peas and other edible greens. With small, regular batches, you can enjoy fresh home-grown microgreens for salads, sandwiches and everyday vegetarian meals.
Next Story