
How to Make a Colourful Peacock Rangoli at Home Using Basic Rangoli Powders

Rangoli is a traditional Indian art form that adds colour and beauty to homes during festivals and special occasions. Among the many designs, peacock rangoli remains a popular choice because of its graceful shape, attractive feathers and vibrant colours. Although a detailed peacock pattern may look complicated, you can create a beautiful design using basic rangoli powders and a few simple techniques.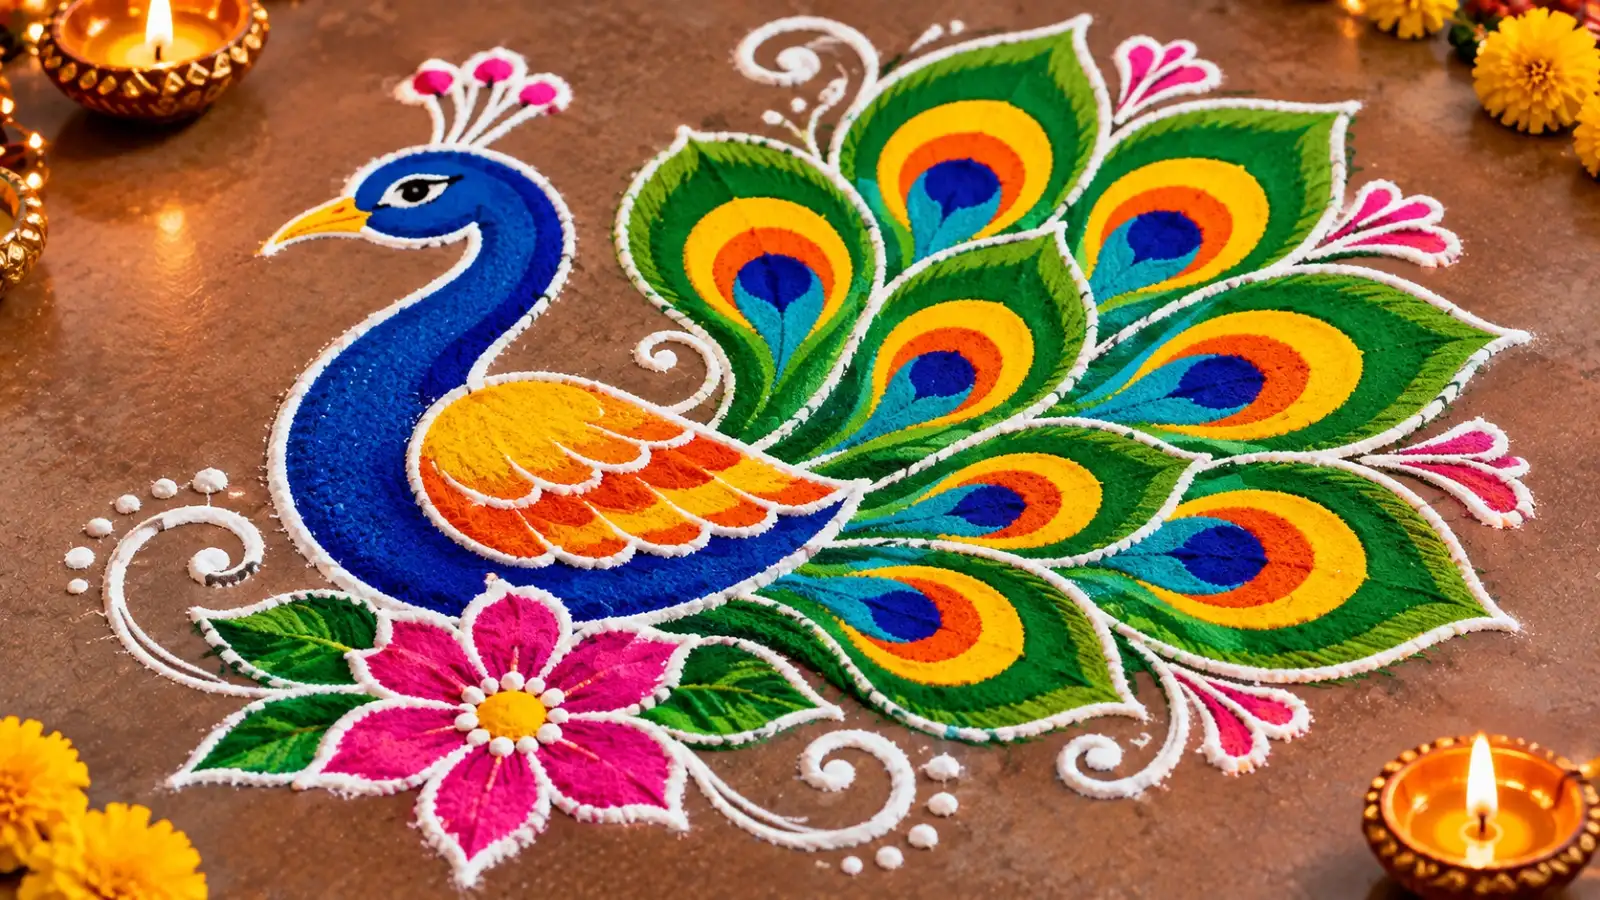
Whether you are decorating your entrance for Diwali, preparing for a family celebration or taking part in a rangoli competition, a peacock design can make your floor decoration stand out. Here is a simple step-by-step guide to help you create one at home.
Using chalk or a white pencil, draw a simple peacock outline. Start with a small head, a curved neck and an oval-shaped body. Extend the tail behind the body and sketch several rounded feather shapes.
Do not worry about making the outline perfect. Keep the design simple so that it is easier to fill with colours.
You can use a darker blue shade along one side of the neck to create a slight shading effect. Leave a small space near the head for the eye and beak.
For a decorative finish, add a thin white outline around the body.
Create a pointed beak using yellow or orange powder. Add three small curved lines above the head to represent the peacock's crown.
Keep these details neat and proportionate so that the bird's face remains clearly visible.
Draw around six to ten feather sections, depending on the size of your design. Keep enough space between them so that each feather can be filled with different colours.
You can use a combination of green, turquoise, blue, yellow and orange to make the tail look vibrant.
For example, use dark blue at the centre, surrounded by turquoise, green and yellow. These layered circles create the familiar eye-like appearance of peacock feathers.
Use white powder to add thin borders or small dots around the feather patterns. This gives the tail a more defined and decorative look.
You can add small dots, curved lines, flowers or simple leaf patterns around the tail. If you want a festive appearance, place a few marigold or rose petals around the outer edge.
Avoid adding too many elements, as they may make the main peacock design look crowded.
Whether you are decorating your entrance for Diwali, preparing for a family celebration or taking part in a rangoli competition, a peacock design can make your floor decoration stand out. Here is a simple step-by-step guide to help you create one at home.
Materials Needed to Make a Peacock Rangoli
You do not need expensive supplies to create this design. Gather the following materials before starting:- Rangoli powders in blue, green, yellow, orange, pink and white
- A small amount of black rangoli powder for outlines
- Chalk or a white pencil for drawing the outline
- A small spoon or paper cone for filling colours
- A fine sieve for spreading powder evenly
- Cotton buds for correcting edges
- Flower petals for additional decoration
- A clean, flat floor surface
Step 1: Clean the Area and Draw a Basic Outline
Choose a flat area near the entrance, in the courtyard or in a spacious room. Clean the floor properly and allow it to dry.Using chalk or a white pencil, draw a simple peacock outline. Start with a small head, a curved neck and an oval-shaped body. Extend the tail behind the body and sketch several rounded feather shapes.
Do not worry about making the outline perfect. Keep the design simple so that it is easier to fill with colours.
Step 2: Create the Peacock's Body and Neck
Use blue rangoli powder to fill the peacock's body and curved neck. Spread the colour gently within the outline using your fingers or a small spoon.You can use a darker blue shade along one side of the neck to create a slight shading effect. Leave a small space near the head for the eye and beak.
For a decorative finish, add a thin white outline around the body.
Step 3: Add the Head, Beak and Crown
Draw a small rounded head at the top of the neck. Use blue powder to fill it and add a tiny black or dark blue dot for the eye.Create a pointed beak using yellow or orange powder. Add three small curved lines above the head to represent the peacock's crown.
Keep these details neat and proportionate so that the bird's face remains clearly visible.
Step 4: Draw the Peacock's Colourful Tail
The tail is the most attractive part of a peacock rangoli. Extend several curved lines from behind the body and create a fan-shaped arrangement of feathers.Draw around six to ten feather sections, depending on the size of your design. Keep enough space between them so that each feather can be filled with different colours.
You can use a combination of green, turquoise, blue, yellow and orange to make the tail look vibrant.
Step 5: Fill the Feathers With Simple Patterns
Fill each feather section with a different colour. Add small oval shapes inside the feathers using contrasting shades.For example, use dark blue at the centre, surrounded by turquoise, green and yellow. These layered circles create the familiar eye-like appearance of peacock feathers.
Use white powder to add thin borders or small dots around the feather patterns. This gives the tail a more defined and decorative look.
Step 6: Add Borders and Decorative Details
Once the main design is complete, use white or yellow powder to create a neat border around the peacock.You can add small dots, curved lines, flowers or simple leaf patterns around the tail. If you want a festive appearance, place a few marigold or rose petals around the outer edge.
Avoid adding too many elements, as they may make the main peacock design look crowded.
Tips for Making Your Peacock Rangoli Look Neat
- Start with a small design if you are a beginner.
- Use a clean and dry floor so the rangoli powder spreads evenly.
- Draw the complete outline before filling in the colours.
- Use a paper cone or small spoon for narrow sections.
- Choose contrasting colours to make the feathers stand out.
- Keep a little extra powder of each colour for corrections.
- Work from the centre towards the outer edges to avoid disturbing finished sections.
Easy Peacock Rangoli Variations to Try
You can customise the design according to your available space and skill level.- Minimal Peacock Rangoli: Create a small peacock using blue, green and white powder with a simple tail.
- Floral Peacock Rangoli: Add flower petals to the tail and surrounding patterns.
- Circular Peacock Rangoli: Place the peacock inside a large circular border with simple geometric designs.
- Diwali Peacock Rangoli: Add small diya patterns around the tail for a festive appearance.
- Two-Colour Peacock Rangoli: Use only blue and green powder with white outlines for a neat, understated design.
Next Story