How To Make DIY Rainbow Bath Bombs For A Relaxing Soak

Nothing beats a warm, fragrant bath after a long day—especially when you add a vibrant, fizzy bath bomb to the mix. Rainbow bath bombs take relaxation to the next level, creating a mesmerising swirl of colours while soothing your skin and senses. The best part? You can make them at home with just a few simple ingredients.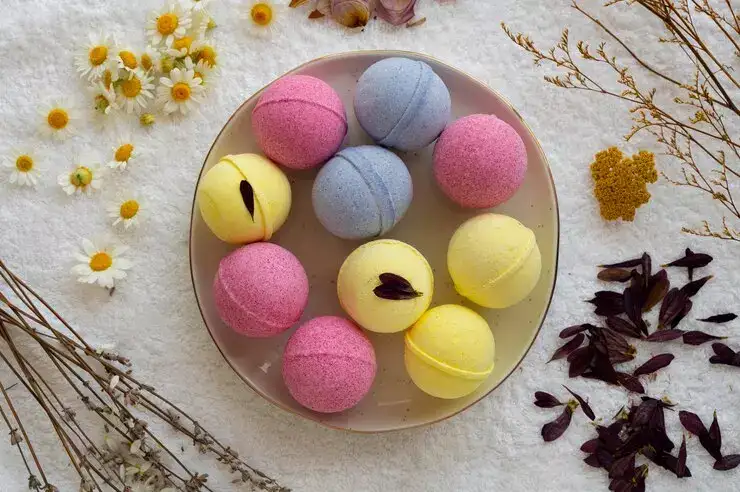
Why Make Your Own Bath Bombs?
Store-bought bath bombs can be expensive and may contain artificial chemicals that irritate sensitive skin. By making your own, you control the ingredients, ensuring they are natural and skin-friendly. Plus, DIY bath bombs make fantastic gifts and can be customised with your favourite colours and scents.
Ingredients You’ll Need
To create your own rainbow bath bombs, gather the following:
Step-by-Step Instructions
1. Mix the Dry Ingredients
In a large bowl, whisk together the baking soda, citric acid, cornstarch, and Epsom salt until well combined.
2. Prepare the Wet Ingredients
In a separate small bowl, mix the coconut oil, water, and essential oil. Slowly add this mixture to the dry ingredients, stirring continuously. Be careful not to add too much liquid at once, or the mixture may start fizzing prematurely.
3. Divide and Colour
Separate the mixture into six smaller bowls. Add a few drops of food colouring to each bowl to create red, orange, yellow, green, blue, and purple mixtures. Stir well to distribute the colour evenly.
4. Layer the Colours
Take your bath bomb mould and layer each coloured mixture one by one, gently pressing down as you go. This will create a beautiful rainbow effect when the bath bomb dissolves.
5. Let It Set
Once the mould is full, press both halves together firmly. Let the bath bombs dry for at least 24 hours before removing them from the mould.
How to Use Your Rainbow Bath Bomb
Simply drop one into a warm bath and watch as it fizzes, releasing a burst of colours and a soothing aroma. The Epsom salt relaxes your muscles, while the essential oils calm your mind, making it the perfect stress-reliever.
DIY rainbow bath bombs are easy to make, fun to customise, and a fantastic way to add a splash of colour to your self-care routine. Whether you’re making them for yourself or as a thoughtful gift, these vibrant bath bombs are sure to bring joy and relaxation.
Why Make Your Own Bath Bombs?
Store-bought bath bombs can be expensive and may contain artificial chemicals that irritate sensitive skin. By making your own, you control the ingredients, ensuring they are natural and skin-friendly. Plus, DIY bath bombs make fantastic gifts and can be customised with your favourite colours and scents.
Ingredients You’ll Need
To create your own rainbow bath bombs, gather the following:
- 1 cup baking soda – The main ingredient that helps create fizz.
- ½ cup citric acid – Reacts with baking soda for that signature bubbling effect.
- ½ cup cornstarch – Helps to harden the bath bomb.
- ½ cup Epsom salt – Soothes muscles and softens skin.
- 3 tablespoons coconut oil or almond oil – Moisturises and binds ingredients together.
- 1 teaspoon water – Just enough to help mix the ingredients.
- 1 teaspoon essential oil (lavender, peppermint, or citrus work well) – Adds a relaxing fragrance.
- Food colouring (red, orange, yellow, green, blue, purple) – To create the rainbow effect.
- Moulds (silicone or plastic bath bomb moulds) – To shape your bath bombs.
Step-by-Step Instructions
1. Mix the Dry Ingredients
In a large bowl, whisk together the baking soda, citric acid, cornstarch, and Epsom salt until well combined.
2. Prepare the Wet Ingredients
You may also like
- Luxury's sneaker obsession
- Why luxury fashion is investing in fitness
- How used tea leaves can help some plants thrive: Simple step-by-step guide to use strained tea leaves as manure
- The man may be gone, but Rohit Bal's magic still walks the runway - DASTKAR becomes a moving tribute to the master
- In 2026, India's 550-Year-Old Great Banyan Tree is as big as an entire Forest
In a separate small bowl, mix the coconut oil, water, and essential oil. Slowly add this mixture to the dry ingredients, stirring continuously. Be careful not to add too much liquid at once, or the mixture may start fizzing prematurely.
3. Divide and Colour
Separate the mixture into six smaller bowls. Add a few drops of food colouring to each bowl to create red, orange, yellow, green, blue, and purple mixtures. Stir well to distribute the colour evenly.
4. Layer the Colours
Take your bath bomb mould and layer each coloured mixture one by one, gently pressing down as you go. This will create a beautiful rainbow effect when the bath bomb dissolves.
5. Let It Set
Once the mould is full, press both halves together firmly. Let the bath bombs dry for at least 24 hours before removing them from the mould.
How to Use Your Rainbow Bath Bomb
Simply drop one into a warm bath and watch as it fizzes, releasing a burst of colours and a soothing aroma. The Epsom salt relaxes your muscles, while the essential oils calm your mind, making it the perfect stress-reliever.
DIY rainbow bath bombs are easy to make, fun to customise, and a fantastic way to add a splash of colour to your self-care routine. Whether you’re making them for yourself or as a thoughtful gift, these vibrant bath bombs are sure to bring joy and relaxation.






Loving Newspoint? Download the app now