Traditional Chinese Snow Skin Moon Cake Recipe You Can Make at Home

Soft, chewy, and beautifully delicate, Snow Skin Moon Cake is a modern twist on the traditional Chinese mooncake. Unlike the classic baked mooncakes enjoyed during the Mid-Autumn Festival, snow skin mooncakes are not baked. They feature a smooth, mochi-like outer layer and are filled with sweet fillings such as lotus seed paste, red bean paste, custard, or fruit.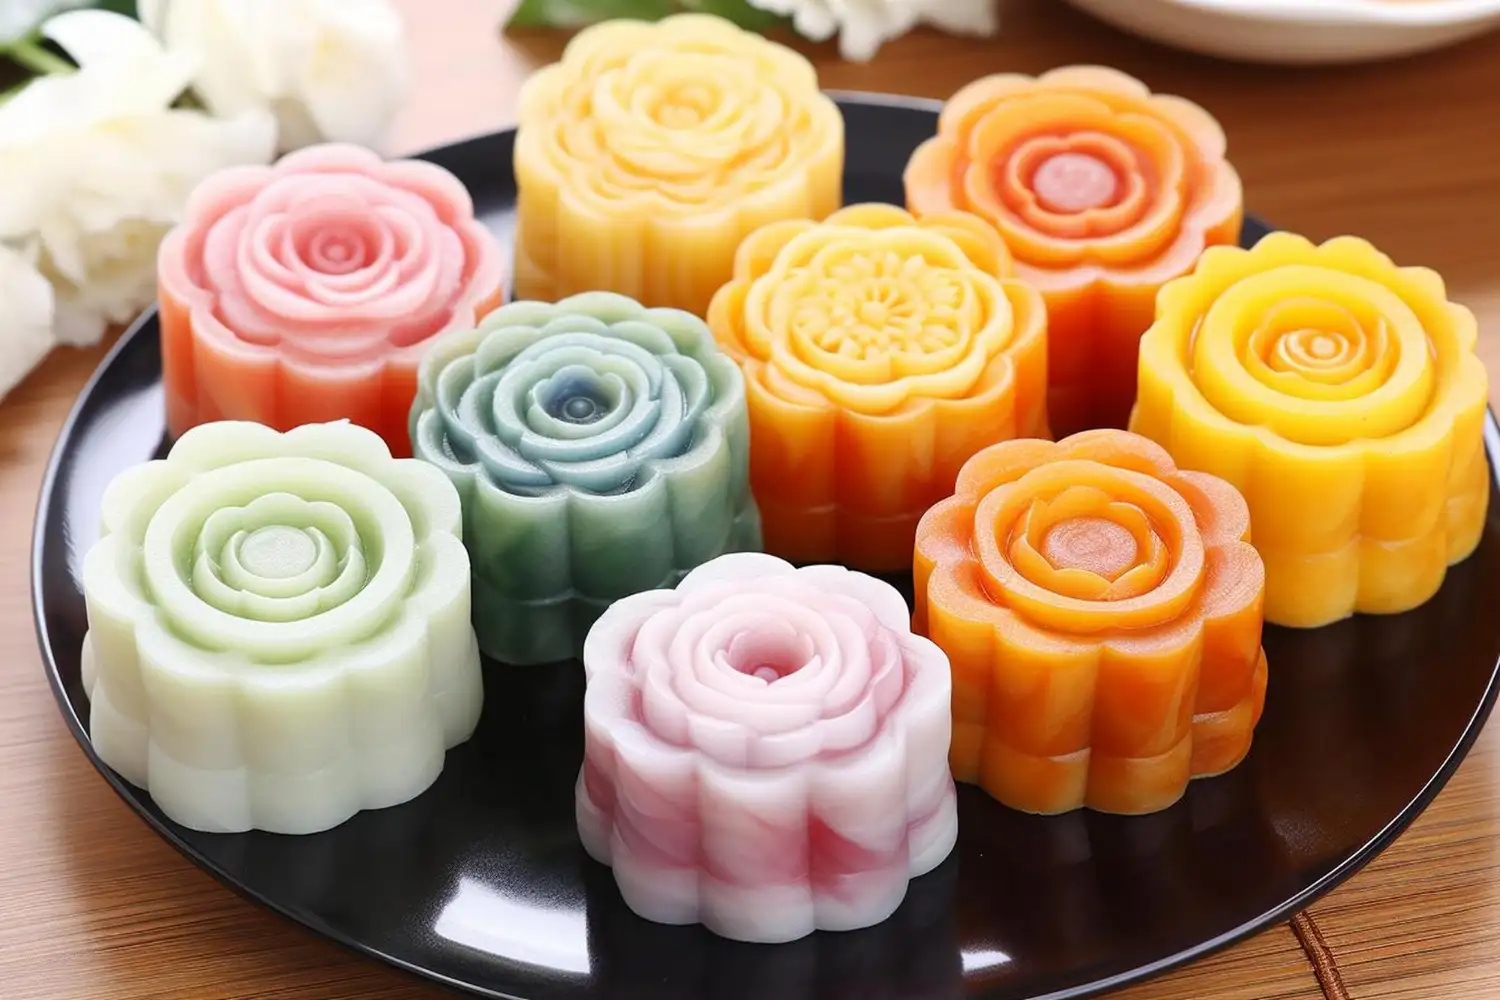
Served chilled, these elegant treats are loved for their light texture, vibrant colors, and refreshing taste. Here's everything you need to know about making traditional Chinese snow skin mooncakes at home.
What Is a Snow Skin Moon Cake?
Snow skin mooncakes, also known as 'bing pi' mooncakes, originated in Hong Kong during the 1960s. Their name comes from the pale, snowy appearance of the outer skin. Instead of being baked, the dough is made from glutinous rice flour and steamed before being wrapped around a sweet filling.
The result is a soft, chewy dessert that's perfect for warm weather and festive celebrations.
Ingredients
For the Snow Skin
For the Filling
How to Make Snow Skin Moon Cakes
Step 1: Prepare the Dough
Mix the glutinous rice flour, rice flour, wheat starch, and powdered sugar in a bowl. Add milk and vegetable oil, whisking until smooth.
Step 2: Steam the Mixture
Pour the batter into a heatproof dish and steam for about 25-30 minutes until fully cooked. Stir halfway if needed for even cooking.
Step 3: Cool and Knead
Allow the steamed dough to cool completely. Lightly oil your hands and knead the dough until smooth, soft, and elastic.
Step 4: Prepare the Filling
Roll the lotus seed paste or your preferred filling into equal-sized balls. If using salted egg yolks, wrap the paste around the yolk before shaping.
Step 5: Wrap the Mooncakes
Divide the dough into equal portions. Flatten each piece into a small disc and wrap it around the filling, sealing the edges carefully.
Step 6: Shape the Mooncakes
Dust the dough lightly with cooked glutinous rice flour and place it into a mooncake mould. Press firmly, then gently release to reveal the decorative pattern.
Step 7: Chill Before Serving
Refrigerate the mooncakes for at least two hours before serving. Chilling improves both the texture and flavour.
Popular Filling Ideas
Tips for Perfect Snow Skin Moon Cakes
Why They're So Popular
Snow skin mooncakes have become a favourite because they are lighter than traditional baked mooncakes and offer endless flavour possibilities. Their colourful appearance and intricate designs also make them a popular homemade gift during the Mid-Autumn Festival.
Traditional Chinese snow skin mooncakes combine festive tradition with a soft, refreshing twist. Their chewy outer layer, rich fillings, and elegant presentation make them a standout dessert for celebrations or afternoon tea. With a few simple ingredients and no baking required, these beautiful mooncakes are surprisingly easy to prepare at home and are sure to impress family and friends.
Served chilled, these elegant treats are loved for their light texture, vibrant colors, and refreshing taste. Here's everything you need to know about making traditional Chinese snow skin mooncakes at home.
What Is a Snow Skin Moon Cake?
Snow skin mooncakes, also known as 'bing pi' mooncakes, originated in Hong Kong during the 1960s. Their name comes from the pale, snowy appearance of the outer skin. Instead of being baked, the dough is made from glutinous rice flour and steamed before being wrapped around a sweet filling.The result is a soft, chewy dessert that's perfect for warm weather and festive celebrations.
Ingredients
For the Snow Skin
- 50 g glutinous rice flour
- 50 g rice flour
- 25 g wheat starch
- 40 g powdered sugar
- 200 ml milk
- 25 ml vegetable oil
- A few drops of food colouring (optional)
For the Filling
- 300 g lotus seed paste or red bean paste
- Salted egg yolk (optional)
- Matcha, chocolate, custard, or fruit-flavoured fillings (optional)
- For Dusting
- Cooked glutinous rice flour
How to Make Snow Skin Moon Cakes
Step 1: Prepare the Dough
Mix the glutinous rice flour, rice flour, wheat starch, and powdered sugar in a bowl. Add milk and vegetable oil, whisking until smooth.You may also like
- Opportunities for marriage may open up during Gupt Navratri! Perform these surefire remedies on Ashtami and Navami..
- Why Random Conversations Build Stronger Relationships
- Meet Akira, a toddler who has four world records in kick scootering before turning 2: Her parents say, “We didn't choose her passion, we noticed it”
- 8th Pay Commission: Fitment factor 2.0, 2.1, or 2.57? See the full breakdown of how much your HRA could increase.
- Skin Care Tips: Your skin will remain glowing even with age; follow these simple tips; your face will glow
Step 2: Steam the Mixture
Pour the batter into a heatproof dish and steam for about 25-30 minutes until fully cooked. Stir halfway if needed for even cooking. Step 3: Cool and Knead
Allow the steamed dough to cool completely. Lightly oil your hands and knead the dough until smooth, soft, and elastic. Step 4: Prepare the Filling
Roll the lotus seed paste or your preferred filling into equal-sized balls. If using salted egg yolks, wrap the paste around the yolk before shaping. Step 5: Wrap the Mooncakes
Divide the dough into equal portions. Flatten each piece into a small disc and wrap it around the filling, sealing the edges carefully.Step 6: Shape the Mooncakes
Dust the dough lightly with cooked glutinous rice flour and place it into a mooncake mould. Press firmly, then gently release to reveal the decorative pattern. Step 7: Chill Before Serving
Refrigerate the mooncakes for at least two hours before serving. Chilling improves both the texture and flavour. Popular Filling Ideas
- Lotus seed paste
- Sweet red bean paste
- Matcha filling
- Custard cream
- Chocolate ganache
- Mango puree
- Coconut paste
- Black sesame paste
- Taro paste
Tips for Perfect Snow Skin Moon Cakes
- Always let the dough cool before kneading.
- Dust the mould lightly to prevent sticking.
- Keep the dough covered to stop it from drying out.
- Use high-quality fillings for the best flavour.
- Chill the mooncakes before eating for the ideal chewy texture.
- Store them in an airtight container in the refrigerator.
Storage Tips
Snow skin mooncakes are best enjoyed within 2-3 days of preparation. Keep them refrigerated at all times and avoid leaving them at room temperature for long periods. They can also be frozen for up to one month and thawed in the refrigerator before serving.Why They're So Popular
Snow skin mooncakes have become a favourite because they are lighter than traditional baked mooncakes and offer endless flavour possibilities. Their colourful appearance and intricate designs also make them a popular homemade gift during the Mid-Autumn Festival. Traditional Chinese snow skin mooncakes combine festive tradition with a soft, refreshing twist. Their chewy outer layer, rich fillings, and elegant presentation make them a standout dessert for celebrations or afternoon tea. With a few simple ingredients and no baking required, these beautiful mooncakes are surprisingly easy to prepare at home and are sure to impress family and friends.






Loving Newspoint? Download the app now